
A Pro Guide to Peel and Stick Tile Installation
Peel and stick tile is a fantastic, budget-friendly way to get a high-end look without the headache of grout, mortar, or hiring a professional. It's a game-changer for renters and homeowners alike, offering a quick and surprisingly durable refresh for places like kitchens and bathrooms. Welcome to Modern Essentials, your destination for modern essential products that simplify everyday life with style and quality! Discover our curated selection of items designed for those seeking the perfect balance between functionality, contemporary design, and practicality. Whether you're furnishing your home, looking for elegant accessories, or products to enhance your lifestyle, Modern Essentials offers versatile, high-quality solutions for every need. Enjoy free shipping on orders over €50, delivery throughout Europe, and our 30-day money-back guarantee. Transform your everyday with Modern Essentials—where essential meets modern!
Choosing the Right Peel and Stick Tile
Before you even think about peeling off a backing, the most important decision you'll make is the material. This goes way beyond just picking a pretty colour or pattern; it’s about making sure the tile can handle the heat, moisture, and daily wear-and-tear of its new home. Get this right, and you'll sidestep common DIY frustrations.
You'll find that the world of peel and stick is surprisingly varied. Each material brings something different to the table, and understanding those differences is what separates a professional-looking job from a peeling mess. For a bit of design inspiration, you might find some great ideas in our guide to the best home decor online shops.
Matching Material to Your Environment
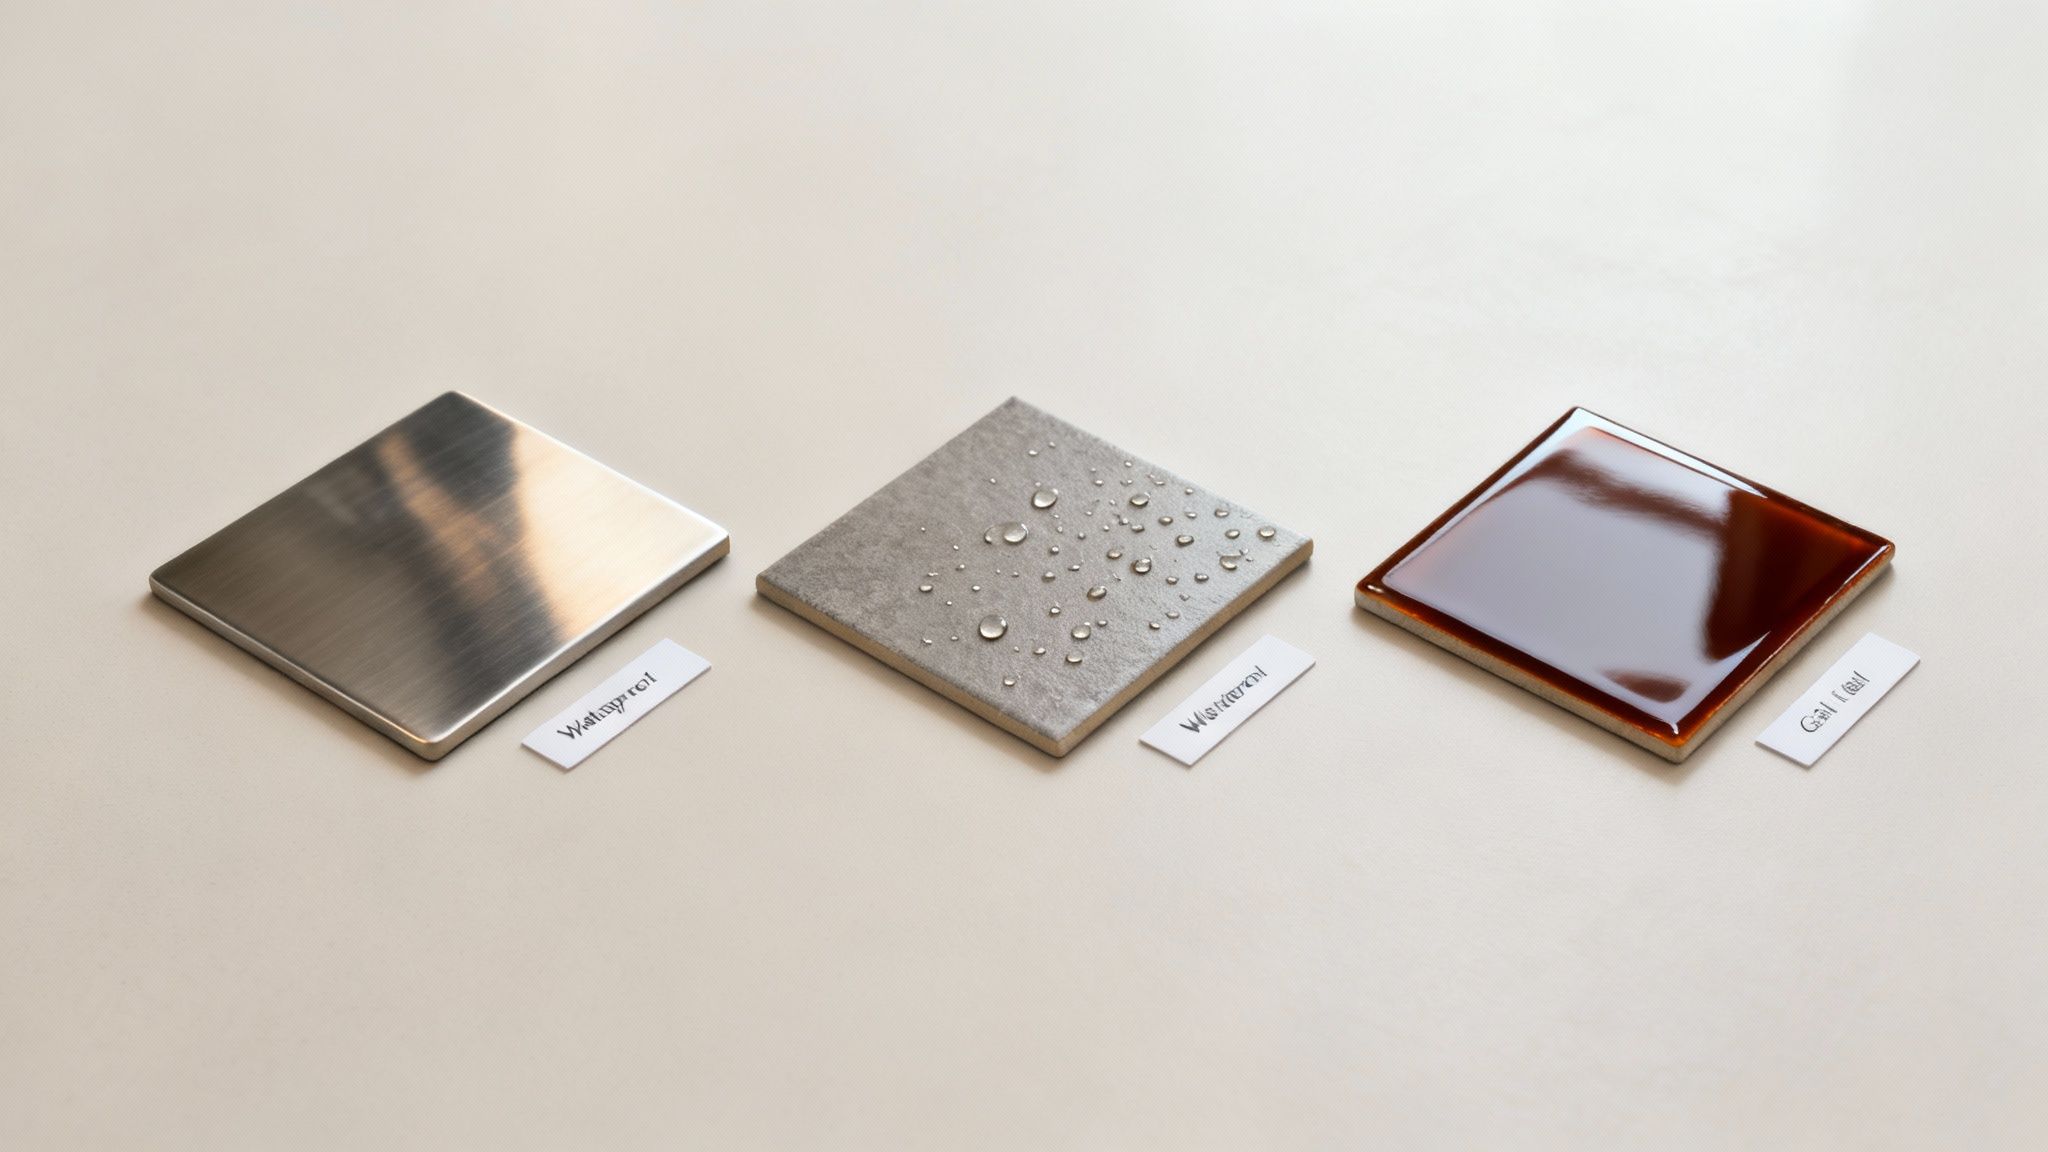
Think about where the tiles will live. Are you planning a backsplash behind your stove? That area gets hot, so you need a material that won't warp or discolour. This is where heat-resistant metal peel and stick tile—usually made from aluminium or stainless steel—is the only real choice. It's built to handle temperature fluctuations without breaking a sweat.
Now, picture a bathroom accent wall or a laundry room splashback. Here, the enemy is moisture. For these spots, waterproof vinyl tiles are your best friend. They’re designed to keep water out, protecting your wall and ensuring the adhesive stays put. Gel tiles, which have a cool 3D epoxy finish, are also a great option for wet areas, giving you a glossy, easy-to-clean surface that mimics real glass.
A Quick Comparison
Choosing the right material is much easier when you know what you're looking for. This table breaks down the most common options to help you match the tile to your project's needs.
Comparing Peel and Stick Tile Materials
| Material Type | Best For | Durability | Water Resistance | Average Cost |
|---|---|---|---|---|
| Vinyl | Floors, bathrooms, general wall applications | High | Excellent | £ - ££ |
| Gel (Epoxy) | Kitchen & bathroom backsplashes (low-heat) | Medium | Excellent | ££ |
| Metal | Kitchen backsplashes (behind stoves), feature walls | Very High | Good | £££ |
| Stone/Composite | High-traffic floors, accent walls | Very High | Good to Excellent | £££ - ££££ |
Ultimately, vinyl offers the best all-around value and versatility, while metal and stone composites provide premium durability for more demanding applications.
It’s no surprise this DIY-friendly solution is booming worldwide. The Asia Pacific self-adhesive tiles market was valued at over USD 2.3 billion in 2023 and is expected to hit USD 4.8 billion by 2032. In India, for example, demand has shot up by 38% recently, which just goes to show how much people value style that's also practical.
Calculating How Much Tile You Need
Alright, you've landed on the perfect material. Now for the most important prep step: measuring. Don't eyeball this!
Pro Tip: Always, always buy at least 10% more tile than you think you need. This isn't just a suggestion—it's your safety net for miscuts, tricky corners around outlets, and having a few spares for future repairs.
To figure out your total, just measure the height and width of your area in metres. Multiply those numbers to get the square metres (a 2-metre-tall by 3-metre-wide wall is 6 square metres). Then, multiply your total by 1.10 to add that crucial 10% extra. This one simple calculation can save you a massive headache later on.
Preparing Your Walls for Perfect Adhesion
You've picked out the perfect peel-and-stick tile, but let's talk about what really makes or breaks these projects. The secret to a finish that looks professional and actually lasts isn't in the tile—it's the wall you're sticking it to.
Proper preparation is, without a doubt, the most important step. It's the one thing that separates a successful DIY from a project that’s peeling at the corners in six months. Think of your wall as the canvas; no matter how beautiful the paint, a flawed canvas will always ruin the final picture. Taking the time now saves you a massive headache later.
The Foundation of a Flawless Finish
So, what makes a great canvas for your new tiles? The ideal surface is smooth, non-porous, and in good shape. Primed and painted drywall with a satin or semi-gloss finish is the gold standard we're aiming for.
On the flip side, some surfaces just won't work and will lead to total failure. It's best to avoid applying tiles directly to:
- Heavily Textured Walls: Things like rough plaster or "popcorn" ceilings don't give the adhesive enough flat surface to grab onto.
- Unprimed or Matte-Painted Drywall: These finishes are like sponges; they just soak up the adhesive, which drastically weakens the bond.
- Bare Plywood or Unsealed Wood: Wood can move and warp with temperature changes, and its porous nature is a deal-breaker for adhesion.
- Freshly Painted Walls: This is a big one. Paint needs a solid 3-4 weeks to fully cure. If you stick tiles on any sooner, you'll trap moisture, and both the paint and the tiles will fail.
Creating the Perfect Surface Step-by-Step
First things first: your walls have to be spotlessly clean. This is non-negotiable. Kitchen walls, especially, get a thin, invisible layer of grease that will completely prevent the tiles from sticking. Use a sugar soap solution or another good degreasing cleaner to wash the entire area. For bathrooms, get rid of any soap scum build-up. After washing, rinse with a cloth and clean water, then let it dry completely.
Moisture is the number one enemy of tile adhesive. Any dampness left in the wall will stop the tiles from sticking and can even lead to mould growing underneath. If you're working in a humid spot like a bathroom or basement, make sure the room is well-ventilated and bone dry. It's not a bad idea to run a smart dehumidifier and moisture absorber for a day or two beforehand just to be certain.
A perfectly prepared wall should be as clean and smooth as a new sheet of paper. Any bump, hole, or speck of dust can create an air pocket behind the tile, leading to a weak spot that may eventually lift.
Next, get that surface perfectly smooth. Fill any nail holes, cracks, or dents with a bit of spackling paste. Use a putty knife and overfill the hole just slightly. Once it's totally dry, sand it perfectly flush with the wall using fine-grit sandpaper.
Finally, think about the wall's finish. If you're starting with high-gloss or semi-gloss paint, the surface is a bit too slick for the adhesive to get a solid grip. You need to give it some "tooth." Just give the entire area a light scuff with fine-grit sandpaper—something around 180-220 grit is perfect. Wipe away all the sanding dust with a damp cloth, and you're good to go. This quick step makes a huge difference in how well the adhesive will bond.
The huge growth in DIY home projects has pushed adhesive technology forward in a big way. The India tile adhesive market alone, valued at USD 284.3 million, is expected to hit USD 831.4 million by 2035. This shows just how much demand there is for strong, reliable adhesives that make products like peel-and-stick tiles work so well. You can read more about this expanding market on marketresearchfuture.com. By following these prep steps, you’re making sure you get the absolute best performance out of that advanced adhesive.
Your Guide to a Professional Installation
With your walls perfectly prepped, you're ready for the most satisfying part of the project: seeing your vision come to life. A truly professional-looking finish isn't about speed; it's all about precision and a bit of clever planning. Stick to a few key techniques, and your project will look balanced, clean, and like it was done by a pro.
The first move you make is the most critical one, as it sets the standard for every single tile that follows. You have to establish perfectly level guidelines.
Finding Your Starting Point
Whatever you do, don't start tiling from a corner or flush against a countertop. Walls and ceilings are almost never perfectly straight. If you use them as your guide, you'll end up with a crooked, lopsided layout. Instead, you need to create your own reference lines.
Measure the width of the main wall you're working on and mark the exact centre. Grab a spirit level or a laser level and draw a dead-straight vertical (plumb) line from that mark. Next, draw a horizontal (level) line that crosses it. This "plus" sign is now your starting grid. It guarantees your design is perfectly centred and balanced, no matter how wonky the room's architecture might be.
The infographic below walks through the crucial prep work that needs to happen before you even think about drawing these lines.
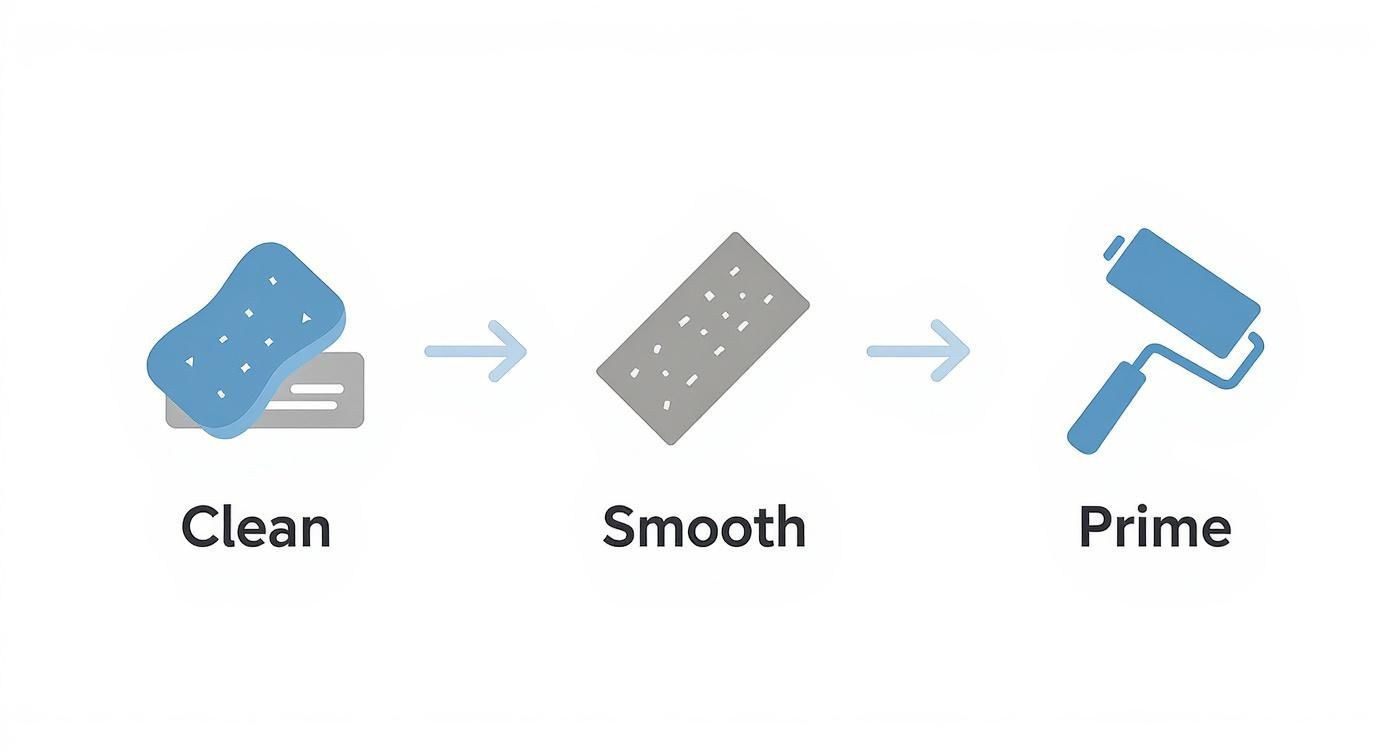
Think of it this way: a clean, smooth, and primed surface is the foundation for everything that comes next. Get that right, and you're halfway there.
Placing the First Tile
Your first tile is the anchor for the entire wall. It has to be placed with absolute accuracy.
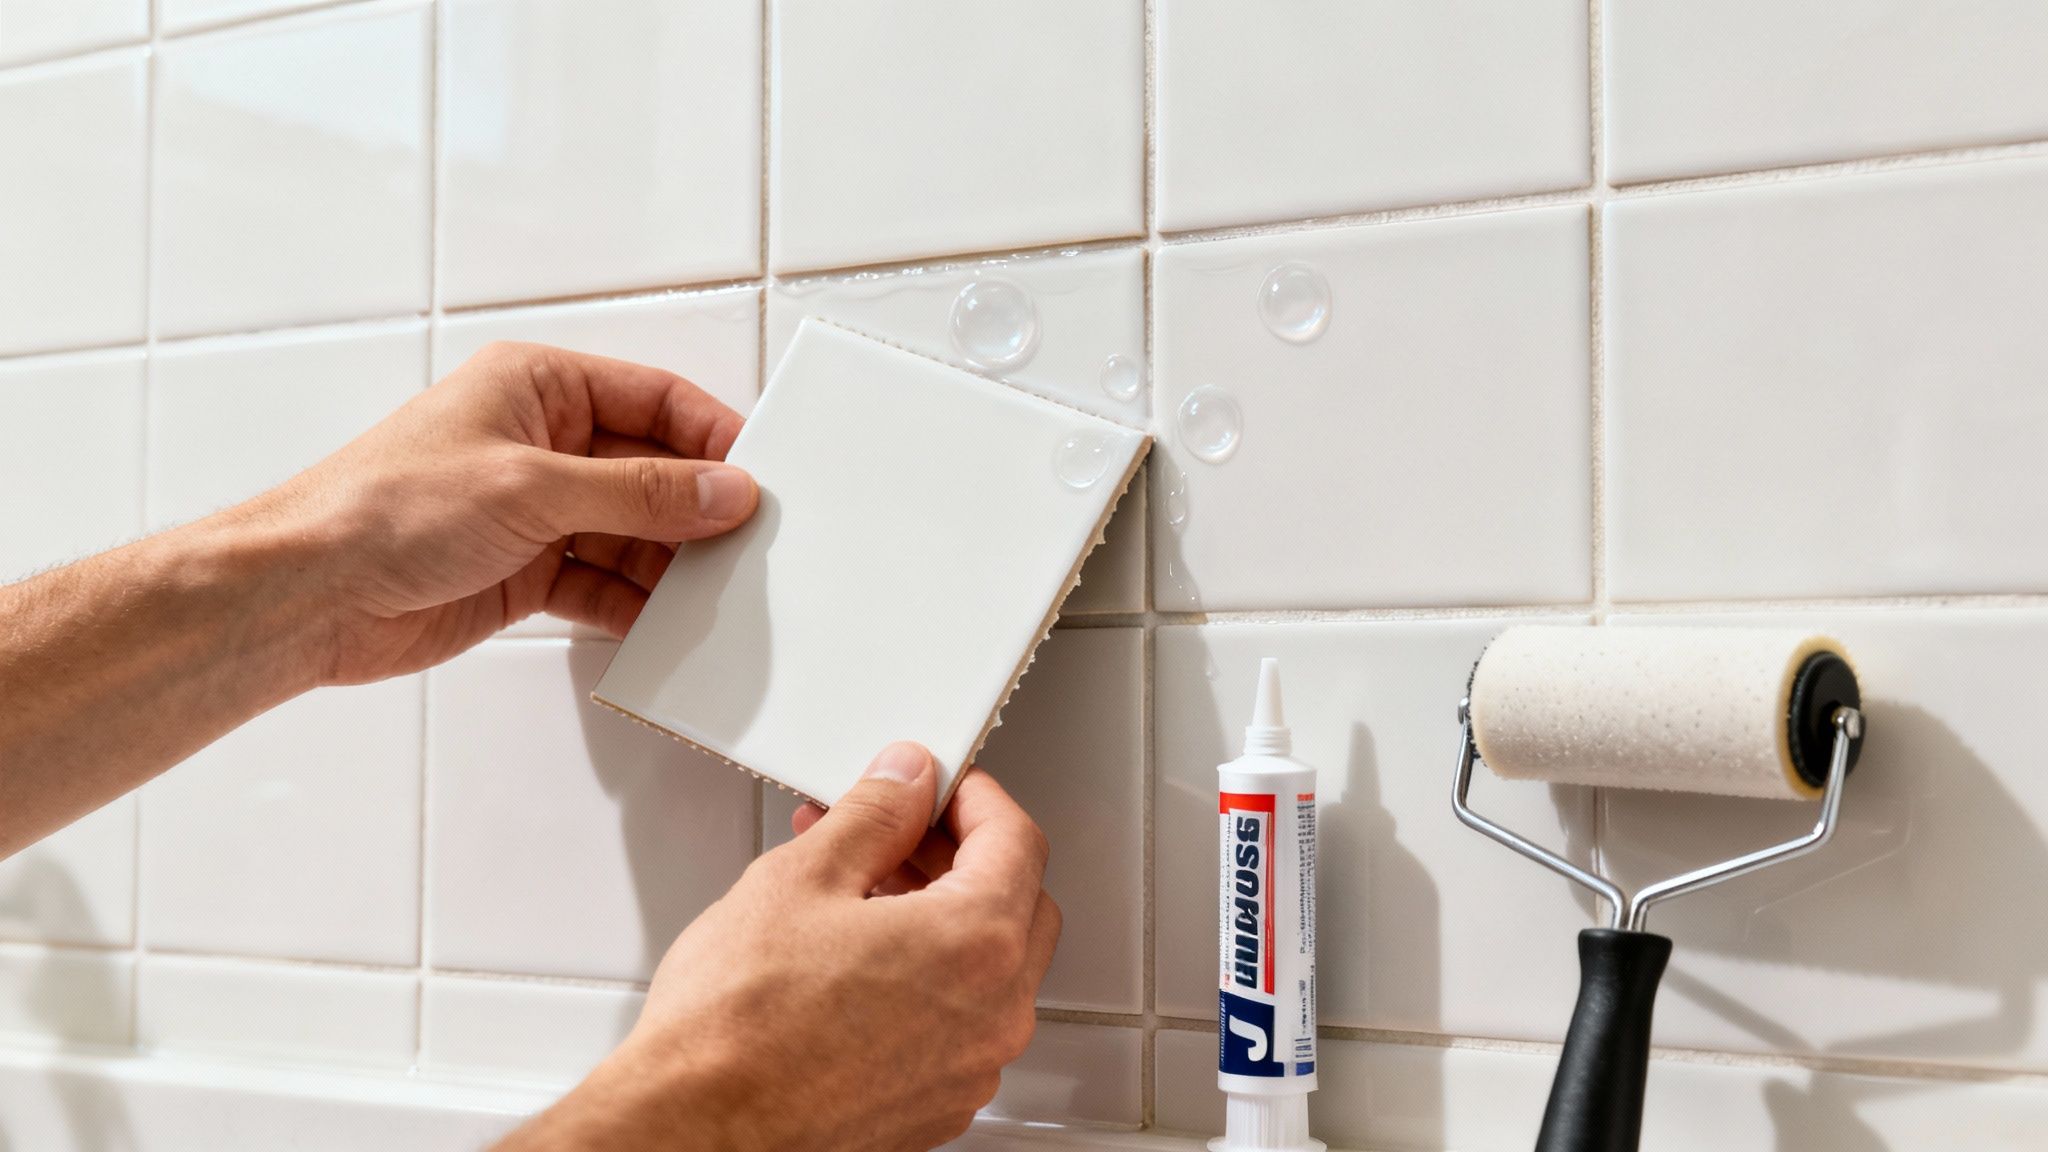
To give yourself some wiggle room, start by peeling only the top half of the backing paper away from the tile.
Carefully line up the top edge of your tile with your horizontal guideline and the side edge with your vertical one. Once you're happy with the position, press that exposed adhesive section firmly onto the wall. Now you can slowly peel away the rest of the backing, smoothing the tile down from the centre outwards as you go. This simple technique is your best defence against trapped air bubbles.
Insider Tip: Don’t slam the entire tile down with full force right away. A light touch allows you to make tiny adjustments. Once you're certain it's perfectly positioned, then you can commit. Use a J-roller or a clean, dry cloth to apply firm, even pressure across the whole surface, paying special attention to the edges.
Creating a Seamless Finish
As you keep placing tiles, the goal is to build a seamless, authentic-looking surface. How the tiles connect will depend on their specific design. Many modern peel-and-stick sheets are made with an "overlap" method in mind.
These tiles typically have a slightly extended, transparent edge that you’ll overlap onto the previous tile, which cleverly hides the seam. For tiles meant to mimic individual ceramic or stone, you'll want to create a consistent "grout line" by leaving a small, uniform gap between each one. Use tile spacers—1/16" is common—to make sure every gap is identical.
Mastering Tricky Cuts
The real test of any tiling job is how you handle the obstacles. Trimming tiles to fit neatly around outlets, light switches, and corners is what separates an amateur job from a polished, professional one.
You can put the power saw away; a sharp utility knife and a metal straightedge are all you need here.
- For Outlets and Switches: Hold the tile up over the obstacle and use a pencil to mark exactly where you need to cut. Place the tile on a cutting mat, and using your straightedge as a guide, score the lines with the utility knife. It might take a few passes before you can cleanly snap the piece out.
- For Corners: Measure the distance from your last full tile to the corner, taking a measurement at both the top and bottom of where the tile will sit. Transfer those measurements to your new tile, connect the dots with your straightedge, and cut your perfectly angled piece.
Here’s a fantastic pro tip for those tight or curved areas. Gently warm the tile for a few seconds with a hairdryer. This makes the material just a little more pliable and much easier to cut and fit into awkward spaces without cracking. Of course, good lighting is essential for getting these cuts just right; you can find some great ideas in our guide to using LED strip lighting to properly illuminate your workspace. By taking your time, you'll nail a flawless installation that has everyone asking who you hired.
Troubleshooting Common Installation Issues
Even the most carefully planned DIY project can hit a small snag. It happens. The great thing about working with peel and stick tiles is that most of these little hiccups are surprisingly easy to fix right on the spot.
Knowing what to do when a tile goes on a bit wonky or a corner refuses to stick gives you the confidence to see the project through. Instead of letting a minor mistake derail your progress, you can handle it like a pro and get that beautiful result you're after. The trick is to act fast before the adhesive fully cures.
Fixing a Crooked Tile
You've just placed a tile, pressed it down, and stepped back to admire your work, only to see it’s slightly crooked. Don't worry, and definitely don't panic. If you catch it within the first few minutes, this is an easy fix.
Take your utility knife or a thin putty knife and gently pry up one corner of the tile. Work slowly, peeling it back from the wall without stretching or creasing it. Most quality adhesives are designed to be forgiving for a very short window, allowing for exactly this kind of quick adjustment. Once it's off, simply realign it with your guidelines and press it firmly back into place.
A word of caution: if you wait too long, that adhesive will form a much stronger bond, and trying to remove the tile could damage both the tile and the wall. It’s always better to pause and fix a mistake immediately. A single crooked tile can throw off the entire pattern down the line.
Dealing with Lifting Corners and Edges
Every now and then, a corner or an edge just won't stick down properly. This is usually because a tiny bit of dust got trapped underneath or that specific spot on the wall wasn't perfectly clean. Thankfully, the fix is simple.
All you need is a little extra adhesive. A small dab of heavy-duty construction glue or a specialised seam sealer on the back of the lifting part will do the job. Press the corner firmly against the wall and hold it for a minute or so to help it grab. For a bit of extra insurance, you can stick a piece of painter's tape over the edge for a few hours while the new adhesive sets.
Camouflaging Small Gaps
No matter how precise you are, you might end up with a tiny gap between two tiles that’s just a hair too wide. While perfect placement is the goal, you can easily hide these minor imperfections later.
A thin bead of paintable caulk is your best friend here. Choose a colour that matches your tiles or the "grout" line you're creating. Apply a small amount, smooth the bead with your finger, and wipe away any excess with a damp cloth. This little trick makes those small spacing errors vanish, leaving you with a clean, seamless finish.
It's no surprise these tiles are becoming so popular. The India ceramic tiles market, which includes these versatile peel and stick options, was valued at USD 10.45 billion in 2025 and is projected to climb to USD 15.84 billion by 2030. This boom is driven by people just like you looking for stylish and accessible ways to upgrade their homes. You can dig into the numbers and see the full report on the Indian tile market growth at mordorintelligence.com.
Smoothing Out Air Bubbles
Nothing is more frustrating than a stubborn air bubble popping up under a perfectly placed tile. But they're easy to defeat. First, try working the bubble out. Using a J-roller or a plastic smoother, press down and push the trapped air from the centre of the bubble towards the nearest edge or seam. Often, this is all it takes.
If the bubble won't budge, it's time for a more direct approach. Take a fine pin or the very tip of a craft knife and poke a tiny hole right in the middle of the bubble. Now, gently press the air out through that nearly invisible opening. The material is usually self-healing, so the pinprick will be impossible to spot once you're done.
Keeping Your Tiles Clean and Damage-Free
https://www.youtube.com/embed/srIMUfigDyU
You've finished your project, and the new tiles look fantastic. The best part? Keeping them that way is surprisingly simple. With a few good habits and the right cleaning methods, you can keep that just-installed look for years to come. The whole game is about being gentle and consistent.
Long-term care really starts with knowing what your specific tiles can handle. Most of the vinyl and gel tiles out there are incredibly tough, but they don't play well with abrasive cleaners or harsh chemicals. It's best to stick to the basics.
For most day-to-day cleaning, a splash of pH-neutral dish soap in warm water is all you’ll ever need. If you run into a more stubborn spot, a 50/50 mix of white vinegar and water usually does the trick without harming the tile's finish.
Safe Cleaning Practices
Stay far away from scouring powders, steel wool, and anything with stiff bristles. They'll inevitably leave behind tiny scratches that dull the finish over time, making your beautiful tiles look tired and worn. Instead, grab a soft cloth, a sponge, or a microfibre mop.
Getting into the habit of wiping up spills right away will also make a huge difference. In a kitchen, things like tomato sauce, wine, or oil can stain if you let them sit. A quick wipe with a damp cloth is all it takes to stop them from setting in.
If you want to make daily upkeep even simpler, you can always check out some modern cleaning gadgets that are designed to make chores less of a drag.
Key Takeaway: If there's one rule to remember, it's this: don't flood the surface with water. The tiles are water-resistant, sure, but too much water can sneak between the seams and mess with the adhesive underneath. Always use a damp cloth, never a soaking wet one.
Damage-Free Removal for Renters
One of the best things about peel-and-stick tile is how perfect it is for renters. When your lease is up, you can get the wall back to its original state without a trace—as long as you do it correctly. Your secret weapon here is heat.
The first step, and it's one you can't skip, is to gently apply heat with a hairdryer. Put it on a low or medium setting and hold it about 15-20 centimetres away from the tile. Wave it back and forth for about 30-60 seconds to warm the tile evenly.
This little bit of warmth softens up the adhesive, making it pliable and much easier to peel away without a fight. Once the tile is warm to the touch, you can use a plastic putty knife or even just a fingernail to carefully lift one corner.
The Removal Process, Step by Step
Once you've got a corner up, start peeling the tile off the wall slowly and steadily. Make sure you pull down at a sharp angle—almost 180 degrees—instead of pulling it straight out. This little technique is what prevents you from taking paint or a chunk of drywall with it.
- Work in Sections: Don't get ahead of yourself. Heat one tile, peel it off, then move to the next. This ensures the adhesive is always warm and cooperative when you're pulling.
- Patience is Key: If a tile is putting up a fight, stop pulling. It just means it needs a bit more heat. Trying to force a cold tile off is a surefire way to cause damage.
- Check for Residue: After all the tiles are gone, you’ll probably find a few sticky spots left behind. This is totally normal and easy to handle.
For any leftover adhesive, a cloth with some soapy water or a citrus-based cleaner will work perfectly. Just rub the sticky areas in a circular motion, then wipe everything down with a clean, damp cloth. Follow these steps, and you'll leave the wall exactly as you found it—making it much easier to get that security deposit back.
Common Questions & Quick Answers
Even the most straightforward project can bring up a few questions. I've been working with peel-and-stick tiles for years, and these are the queries that pop up time and time again. Here are some real-world answers to help you get your project done right.
Can I Put Peel and Stick Tiles Directly Over My Old Ceramic Tiles?
Yes, absolutely! This is one of the biggest perks—no messy demolition needed. But, and this is a big but, your success hinges entirely on getting the surface ready.
Your mission is to create a perfectly flat canvas for the new tiles. Start by giving the old tiles a serious scrub to get rid of any soap scum, grease, or general grime. Next, and this is the crucial part, you have to deal with the grout lines. Grab some plaster or a levelling compound and skim a thin layer over the entire surface to make it smooth. Once it's dry, sand it down.
For a truly professional finish, a coat of good-quality primer will ensure the new peel-and-stick tile grabs on and doesn't let go.
How Do These Tiles Actually Perform in a Bathroom or Kitchen?
This is a valid concern. The good news is that today’s peel-and-stick options are built for exactly these kinds of spaces. High-quality vinyl, gel, or even metal tiles are designed to be water-resistant, so they can easily handle steam from the shower or the occasional splash behind the kitchen sink.
If you're planning a backsplash behind your hob, make sure you choose a product that is specifically rated as heat-resistant. This will prevent any warping or discolouration over time. Honestly, their lifespan really comes down to how well you install them. A clean, dry, and perfectly prepped wall is the secret to making them look great for years.
For more inspiration on refreshing your space with practical decor, check out our guide on stylish design accessories for your home.
A Key Insight: The real test of peel-and-stick tile in a steamy bathroom isn't the tile itself—it's the prep work. A sealed, non-porous wall is your best defence against moisture getting behind the tile and weakening the adhesive.
Is It Really That Easy to Remove Them?
It is! Their reputation as a renter's best friend is definitely earned. The removal process is surprisingly simple and, if you do it with a bit of care, you won't damage the wall underneath. Your best tool for this job? A hairdryer.
Just warm each tile with the hairdryer on a low or medium setting. This softens up the adhesive, making it pliable. Once it's warm, you can usually lift a corner and slowly peel the tile back. This works best on walls that were properly primed and painted with a satin or semi-gloss finish; the tiles tend to come off cleanly without pulling up any paint.
What if there’s some sticky stuff left over? Don't panic. A bit of citrus-based cleaner or even just warm, soapy water on a cloth is usually all it takes to wipe away any residue, leaving your wall looking just as it did before.
Ready to transform your space with the simplicity and style of modern solutions? The curated selection at Modern Essentials offers high-quality products designed to elevate your everyday life. Discover versatile and practical items for every need, from home furnishings to elegant accessories. Shop now at Modern Essentials and enjoy the perfect balance of function and contemporary design.